Synopsis: Once your TLDs are synchronized, you will be able to log in and create a signal plan for your work zone. It is recommended that you drive through the work zone yourself and calculate the time it takes to complete the run in order to have the most accurate times possible.
- Level: Easy
- Time required: 3-5 minutes
- Additional equipment required: None
Related Articles: How to sync three traffic lights (Radio)
1. From the Master unit, log into the V-Touch controller using the Admin login

Figure 1 - Login screen
2. Go to Edit and press the plus (+) button on the right-hand side three times to create three traffic phases. Your screen should look like this:

Figure 2 - Edit screen
3. Double-tap on traffic phase #1 and edit the timings. When the timings are set, hit Apply and then press Back
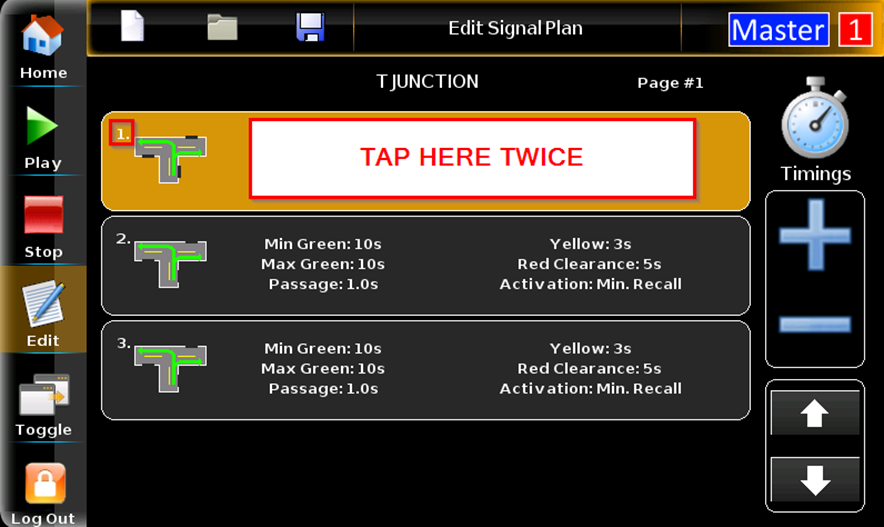
Figure 3 - Signal plan 1

Figure 4 - Inside signal plan 1

Figure 5 - Timings
Note: By pressing between both arrows, a keyboard will pop up and allow you to enter times manually
Minimum green: The shortest amount of time the signal displays green for a particular traffic movement.
Maximum green (used with vehicle detector only): traffic movement. MAX. GREEN The maximum amount of time the signal can display green after any call for an opposing phase.
Passage (used with vehicle detector only): The amount of time by which the minimum green time is increased for each detector actuation by a vehicle. The green time extends until the maximum green time is reached.
Yellow time: The time during which the light will stay yellow (usually left at 3 seconds by default).
Red time: The time it will take to clear the work zone before the other light turns green. It is recommended to put more red time than needed to avoid any collisions or roadblocks.
Activation Methods
Minimum Recall: The default activation method, will play the phases automatically
Call: Will activate using sensors (vehicle detectors)
Preemption: Used for emergency vehicles
4. Tap twice on traffic phase #2 and modify your timings like in step #3

Figure 6 - Signal plan 2
5. After hitting Apply, you will need to change the direction of the green arrow by pressing the traffic light on the screen. When the arrow is changed, press Back

Figure 7 - Inside signal plan 2
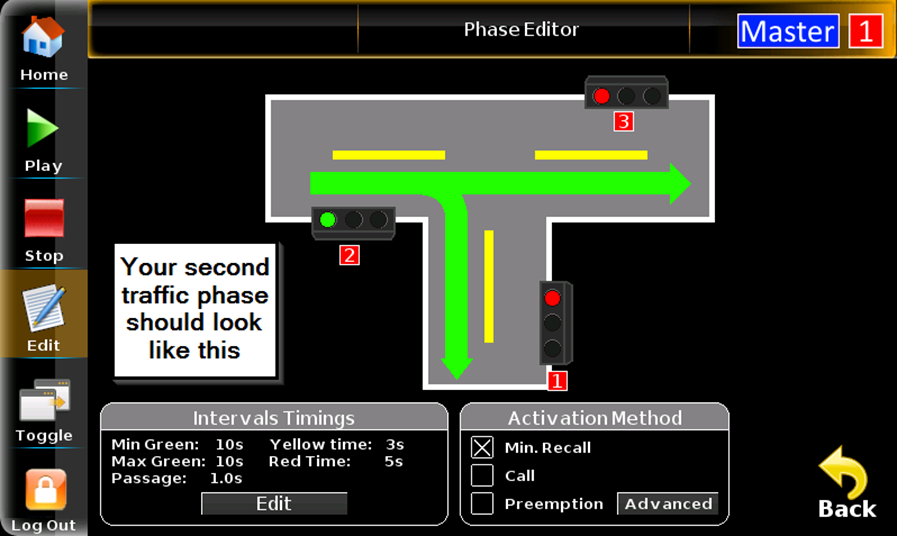
Figure 8 - Signal plan 2 complete
6. Repeat previous steps for your third traffic phase

Figure 9 - Complete signal plan 3
7. Ensure the timings for all traffic phases are correct. If everything is good, press Save and give your signal plan a name
Figure 10 - Save icon

Figure 11 - Signal plan name
8. Once the signal plan is saved, press play, double tap on your plan, and activate it in Automatic mode
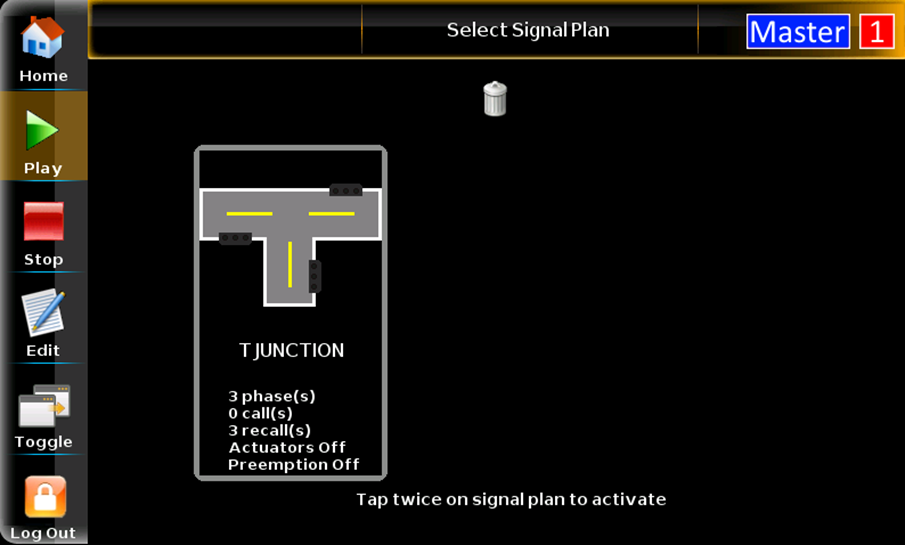
Figure 12 - Signal plan activation

Figure 13 - Activation mode
Note: When your signal plan starts, it is normal that your lights start off as red. This is due to the start-up mode selected in the initial configuration. After running one cycle, your signal plan will kick in.
If you require any additional help, contact our toll-free number at 1-888-488-7446 or email us at support@ver-mac.com
Comments
0 comments
Please sign in to leave a comment.