Synopsis: If your touch screen shows an error code that says Error: Pixel, it indicates an issue with one of the display cards located inside the sign case. This error can prevent you from activating a message on your sign.
- Level: Easy
- Time required: Will vary depending on experience but should take roughly 5-10 minutes.
- Additional equipment required: Philips screwdriver, spare display card, spare data cables
PCMS-1210 Sign Case Overview
- Matrix size X and Y: 40 x 21
- Cards X and Y: 3 lines of 8 display cards per line
- Total cards: 24

Figure 1 - Sign case wiring
1. Log into the V-Touch controller and press Toggle, then Options, then Pixel Test
Figure 2 - How to get to pixel test
2. Press Start on the pixel test screen to see where the pixel issue is
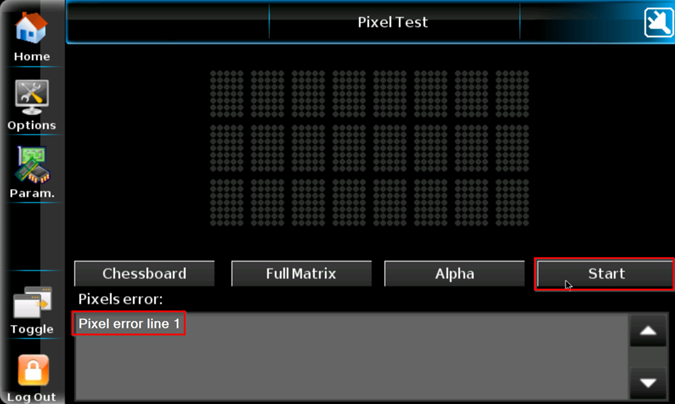
Figure 3 - Pixel test screen
3. To further isolate the issue, go to the communication card inside the sign case and swap lines 1 & 2
Note: The cables you move on the communication card above will vary depending on where the error is. For example, if your error is in line 3, you will swap lines 2 and 3 instead of 1 and 2.

Figure 4 - Lines to swap on the communication card
4. After swapping the cables, go back to the Pixel Test screen and press Start once. After a few seconds, press Start again. The error should have moved to line 2
4.1. If the error moves to line 2, continue to the next step
4.2. If the error does not move, it could be an issue with the communication card

Figure 5 - Error moving
Note: With the error moving to line 2, it confirms the original error in line 1 because the error followed when we moved the wires
5. Place wires 1 & 2 back into their respective ports on the communication card, the error will then return to line 1
6. Press Chessboard on the Pixel Test screen and go to the front of the sign
How the Chessboard Pixel Test works:

Figure 6 - Data flow during chessboard pixel test
6.1. Starts on the left side of Line 1
6.2. Data will go through each display card and light up the LEDs on them
6.3. When it gets to the end of the row, the end line jumper will send data back to the communication card and keep going into line 2
6.4. If there is an error in Line 1, the data will not be able to flow to Line 2 or Line 3, so the cards will not light up
6.5. It is very important that the end line jumpers are plugged in at the end of each line
How to identify the bad display card in Line 1:
6.6. The data will light up the display cards one by one in Line 1. When the pixel test stops running, it means it hit a defective display card

Figure 7 - Pixel test stopping on defective display card
In Figure 7, display card #4 in Line 1 could be defective as it does not light up after receiving data
7. Solutions to fix pixel error
7.1. Replace the bad display card with a known working display card and your Pixel Error will go away. If you do not have any spares, you will need to purchase some.
7.2. You can also try swapping cards 4 and 12 (reference Figure 7) and check if the pixel error moved back to Line 2. If it does, it means the display card you just moved from 4 to 12 is defective because the error followed it
7.3. It is normal that display cards 5 to 24 in Figure 7 do not light up, as the data is not making it due to the bad display card
If you require any additional help, contact our toll-free number at 1-888-488-7446 or email us at support@ver-mac.com
Comments
0 comments
Please sign in to leave a comment.