Synopsis: When your Ver-Mac message boards are added to JamLogic, you will have the ability to create schedules based on your needs and activate them for specific periods of time.
- Level: Intermediate
- Time required: Varies depending on schedule size
- Additional equipment required: PC/Laptop with the latest version of JamLogic installed on it
- Extra information: Schedules can only be created on the desktop version of JamLogic, not on mobile
1. Open the message editor & create all the messages you will need. Then, save them in a folder
Note: You will also need to create a blank message
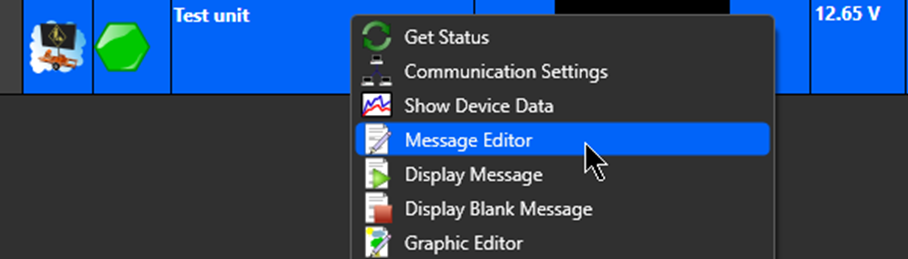
Figure 1 - Message Editor
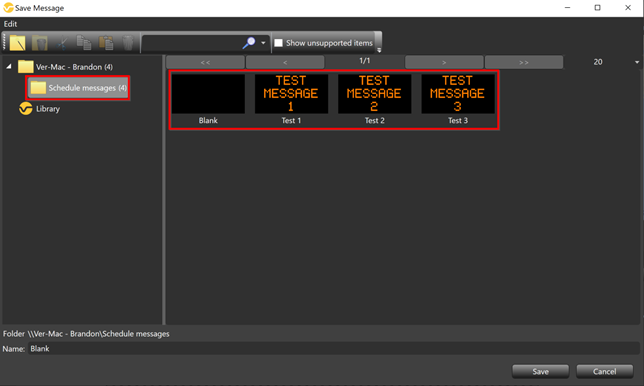
Figure 2 - Saved Messages
2. Right-click on the unit you want to create a schedule for and press Schedule Editor
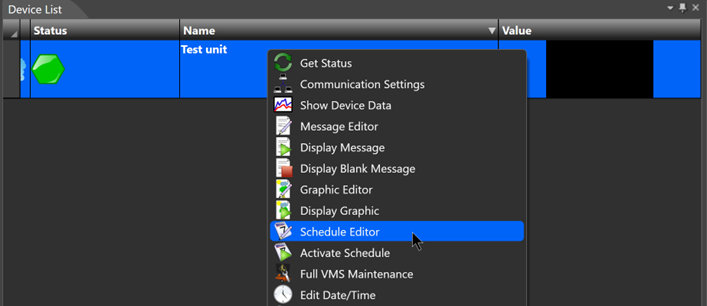
Figure 3 - Schedule editor
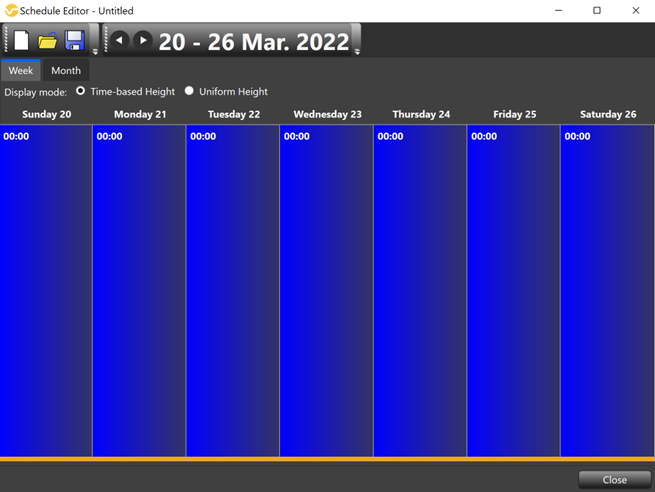
Figure 4 - Blank schedule
3. Select the day you want your schedule to start, right-click the blue box, and press Add Program
3.1. Each program = 1 message
3.2. Each schedule will start with a minimum 1 program (the blue portion seen in figure 4)
3.3. In this schedule, we will have 3 different messages, so we will need a total of 3 programs. At first, it will look similar to this
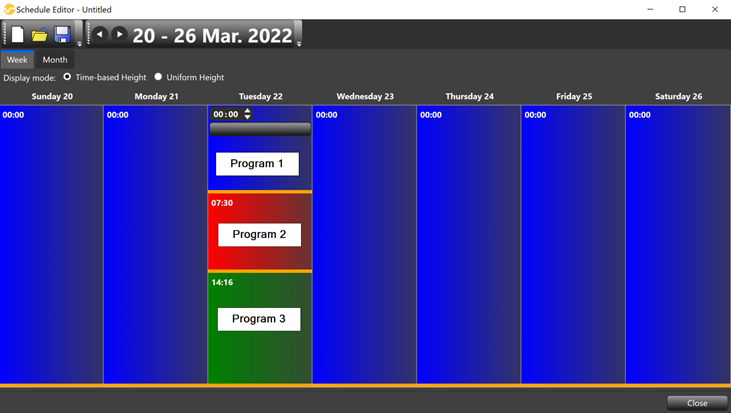
Figure 5 - Program added
4. Add your messages by clicking the program, then the grey box, the message you need, and press Open
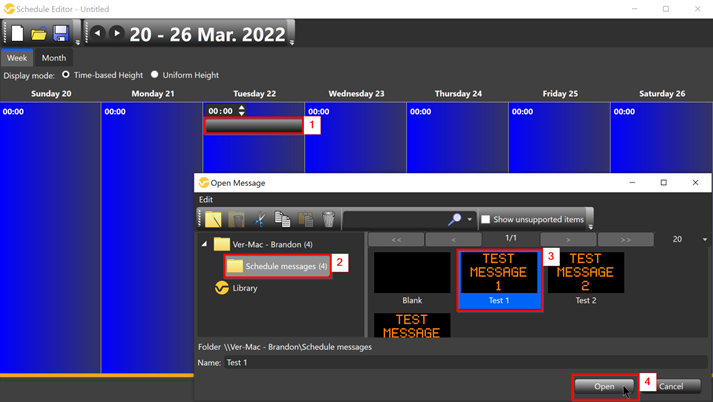
Figure 6 - Adding a message to the program
Note: Once added, it should look like this
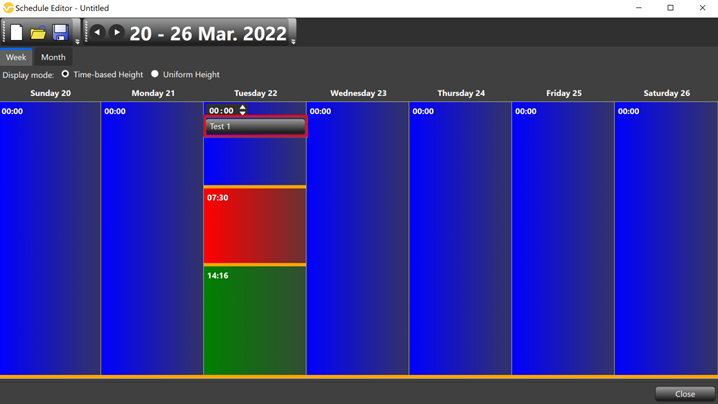
Figure 7 - Message added to the program
5. Repeat step #4 with the rest of your messages
6. Use the orange bar to adjust your time slots for the times you need
Note: JamLogic uses a 24-hour clock, so 1:00 = 1 am & 13:00 = 1 pm
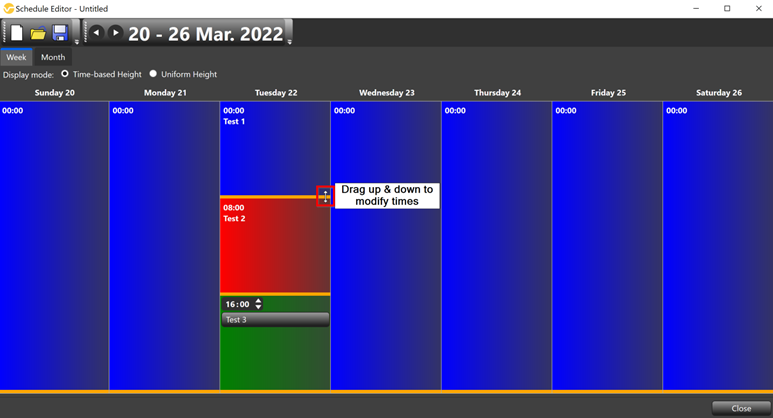
Figure 8 - Adjust time bar
- Midnight – 8:00 am: Test 1 message active
- 8:00am – 4:00 pm: Test 2 message active
- 4:00pm - Midnight: Test 3 message active
7. Add your Blank message on the day you want your schedule to stop. In this example, we want our schedule to stop at midnight
Note: If you do not add your Blank message, the last message of your schedule will continuously run until you manually shut it off
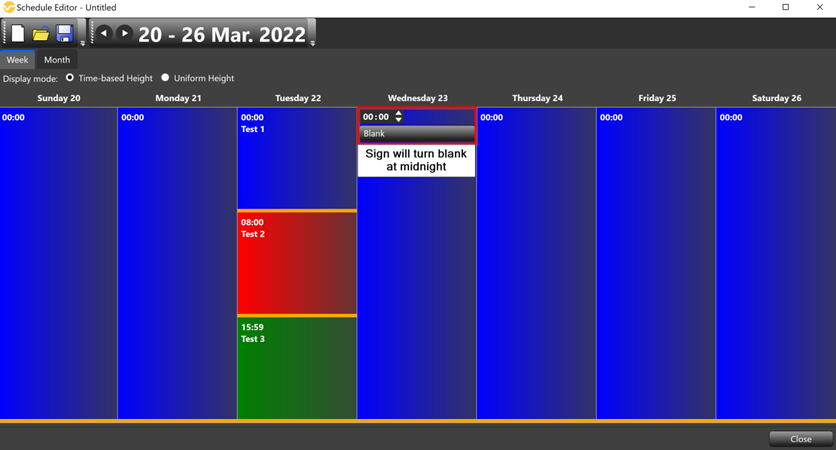
Figure 9 - Blank message
Note: These steps will be identical no matter how many different message changes you have in a day.
8. Save your schedule into a folder and give it a name
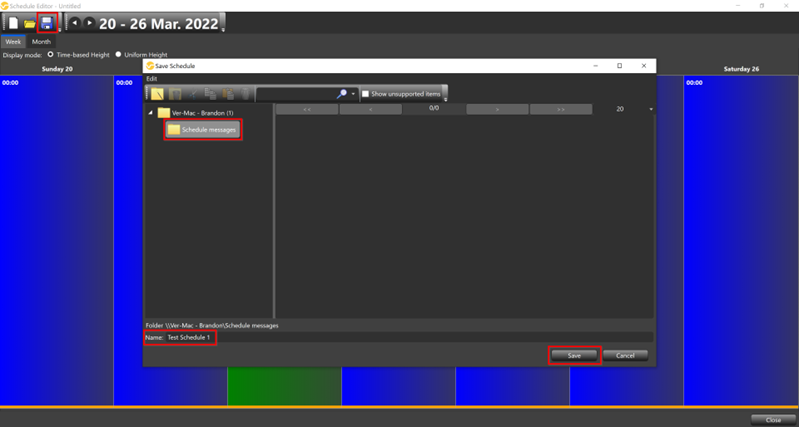
Figure 10 - Save schedule
9. Activate your schedule on the unit of your choice
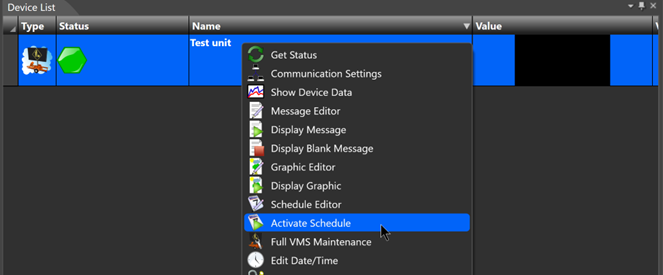
Figure 11 - Activate schedule
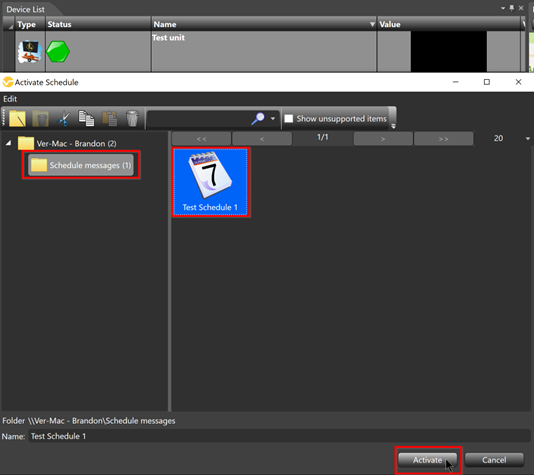
Figure 12 - Saved schedule to activate
Note: When your schedule is activated, you will see a small schedule icon pop up beside the name of your unit.

Figure 13 - Schedule activated icon
Extra: What if I want to copy the same messages for an extended period of time?
1. Right-click the day you want to copy and press Periodicity (day)
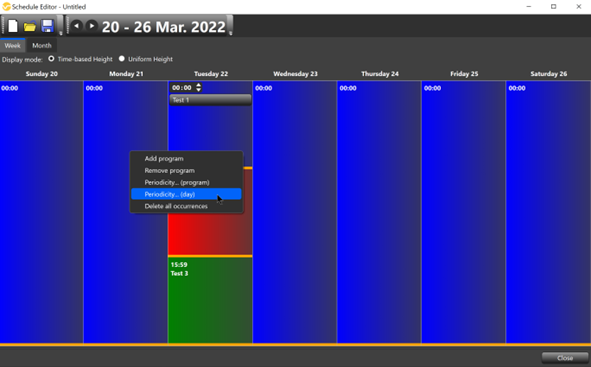
Figure 14 - Periodicity (Day)
2. In the Dayplan Conditions, select weekly, and choose the days you want your schedule to run. Next, select the day you want it to start & end. When done, press OK
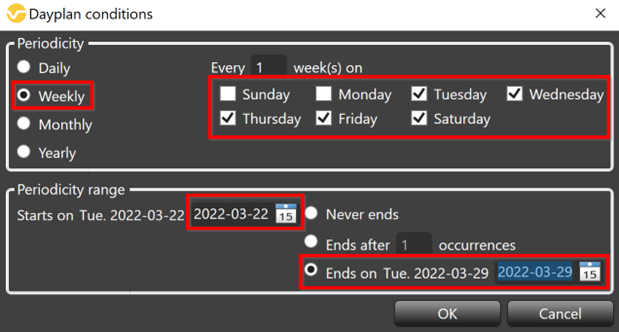
Figure 15 - Dayplan conditions
3. Your schedule should now look like this (depending on the dates you’ve chosen)
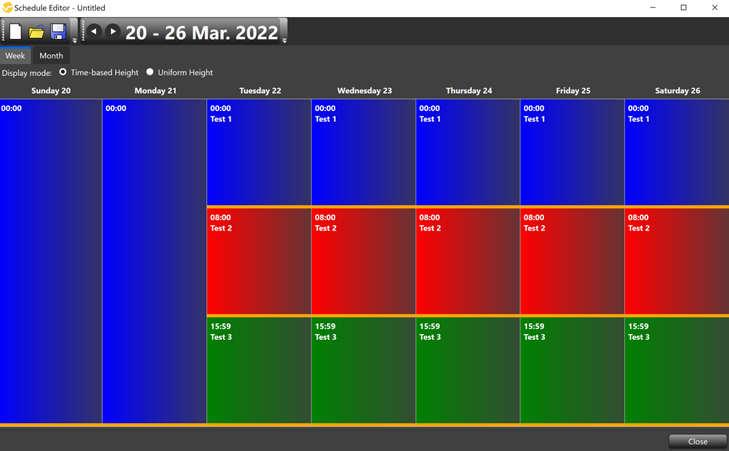
Figure 16 - Periodicity added
If you require any additional help, contact our toll-free number at 1-888-488-7446 or email us at support@ver-mac.com
Comments
0 comments
Please sign in to leave a comment.